Note: Messaging guests is only available on the partner portal and not on OutSavvy Dash
You can send a message to all your guests for your event quickly and easily in the partner portal. You can also schedule event messages as reminders for guests when you set-up your event. You can schedule as many messages as you like.
Note: All messages sent from the system are sent from info@outsavvy.com but the 'Your name' and 'Your email address' you enter as the organiser of the event will be shown when attendees receive the invitation. Attendees see your name and any replies are sent to your address, not info@outsavvy.com.
1 Navigate to the send message screen
In the Dashboard menu for your event navigate to Manage Guests > Message Guests. From here you can view previously sent messages and scheduled messages. You can also download a report of each message sent to view the delivery status of each attendee.
2 Create a new message
Click the Create Message button to schedule a new message to your attendees. Fill in the form raking note of the following fields:
- Your name - enter the name of the person you wish to send the email from. This field is autopopulated with the currently logged in users name.
- Your email address - this email address is used when the attendee reply to the email. Although the email is sent from an OutSavvy email address, this address is used for replies.
- Email subject - enter the subject of your email. A subject is prepopulated but this can be changed.
- Your message - the message you want to send to your attendees. You can view a preview of the message before sending.
- Include event details and a link to guest tickets - you can include details of the event in your message to remind guests and also include a link to download their tickets.
Note: Copying and pasting from a third-party source (Microsoft Word, website, etc.) can cause issues with the layout of your invitation. To prevent formatting issues you should enter information directly into the Your message field.
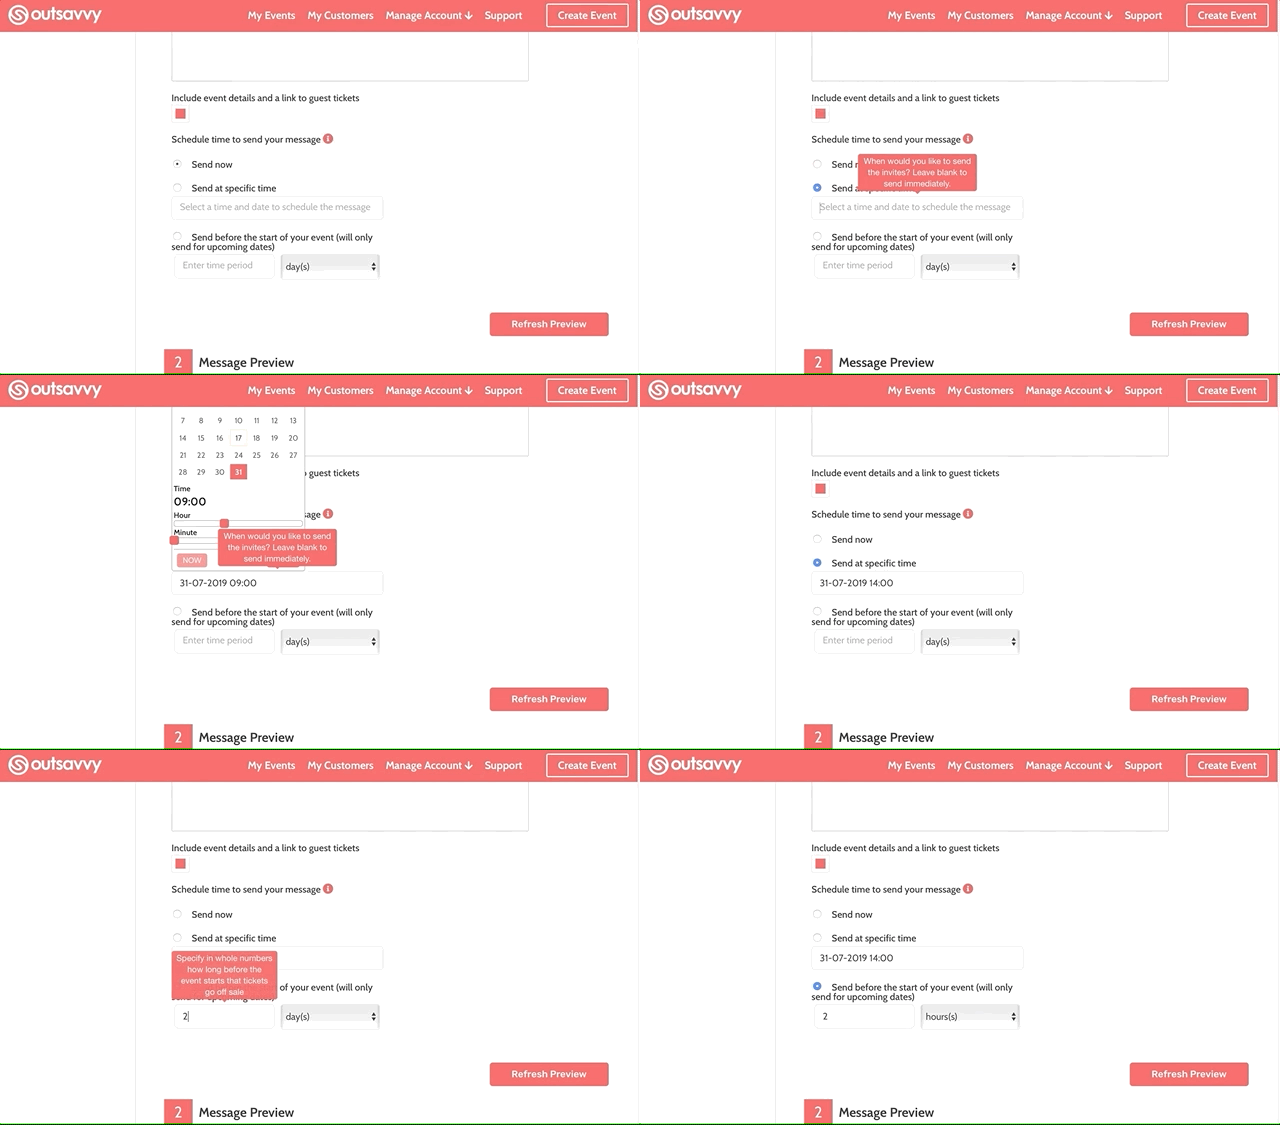
3 Schedule a time
You have three options for scheduling your message:
1. Send now - send the message immediately
2. Send at specific time - select the time and date to send the message
3. Send before the start of your event - schedule the message to send at a time period before the start of your event. Enter the time period and select from hours, days and minutes before the start of your event.

4 Select the guests
You have three options when selecting the guests to send the message to:
1. All attendees - send the message to all guests
2. Specific attendees - choose specific guests from the list
3. All attendees registered after a certain date - schedule the message to send only to guests who registered after a certain date. If you previously sent a message to guests, you can use this option to update new guests.
5 Send the message
Once you have configured the message press the Create the Message button and your message will be sent to all the guests selected at the time you scheduled the message